|
Vickers Hardness Test |
||
|
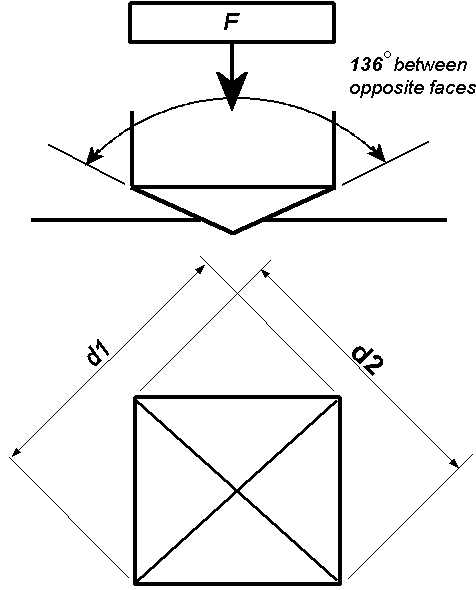
The Vickers hardness test method consists of indenting the test material with a diamond indenter, in the form of a right pyramid with a square base and an angle of 136 degrees between opposite faces subjected to a load of 1 to 100 kgf. The full load is normally applied for 10 to 15 seconds. The two diagonals of the indentation left in the surface of the material after removal of the load are measured using a microscope and their average calculated. The area of the sloping surface of the indentation is calculated. The Vickers hardness is the quotient obtained by dividing the kgf load by the square mm area of indentation.
There is now a trend towards reporting
Vickers hardness in SI units (MPa or GPa) particularly in academic
papers. Unfortunately, this can cause confusion. Vickers hardness (e.g.
HV/30) value should normally be expressed as a number only (without the
units kgf/mm2). Rigorous application of SI is a problem. Most
Vickers hardness testing machines use forces of 1, 2, 5, 10, 30, 50 and
100 kgf and tables for calculating HV. SI would involve reporting force
in newtons (compare 700 HV/30 to HV/294 N = 6.87 GPa) which is
practically meaningless and messy to engineers and technicians. To
convert a Vickers hardness number the force applied needs converting
from kgf to newtons and the area needs converting form mm2 to
m2 to give results in pascals using the formula above. |
||


